Wednesday, December 12, 2012

Quilting your Masterpiece

We all have that same feeling when a quilt top is finished; a sense of relief and accomplishment that we completed another beautiful work of art and how the end result is more beautiful than we could possibly have imagined. However, all that fades when we contemplate the quilting of our masterpiece! One word, DREAD!!!!  Do you know that you should spend as much time quilting you quilt as you did piecing it?  I know so many people who have countless quilt tops completed but left to languish because of their fear of ruining their quilt.

Here is a picture of Mary's quilt, the Lone Star to be exact. First, Mary quilted around each piece with a 1/4" quilting stitch. Then Mary decided to quilt a feathered wreath in the four corners:


The last step was to fill the large triangular space between the two star points. She marked the center line and took measurements then started drawing lines from the center out in even increments.

My advise is take your time and face the challenge of quilting by breaking down your piece into small areas and tackle each space individually. We often become overwhelmed when we look at the quilt as a whole rather than separated into all units.

When I quilted this little number;
I took the time to draw all the lines that needed to be quilted, or I made small marks for reference points to aim for while quilting. The extra time spent marking out all my quilting designs made the whole process both manageable and believe it or not fun!!


Friday, November 30, 2012

New Arrival That Has Me Smitten

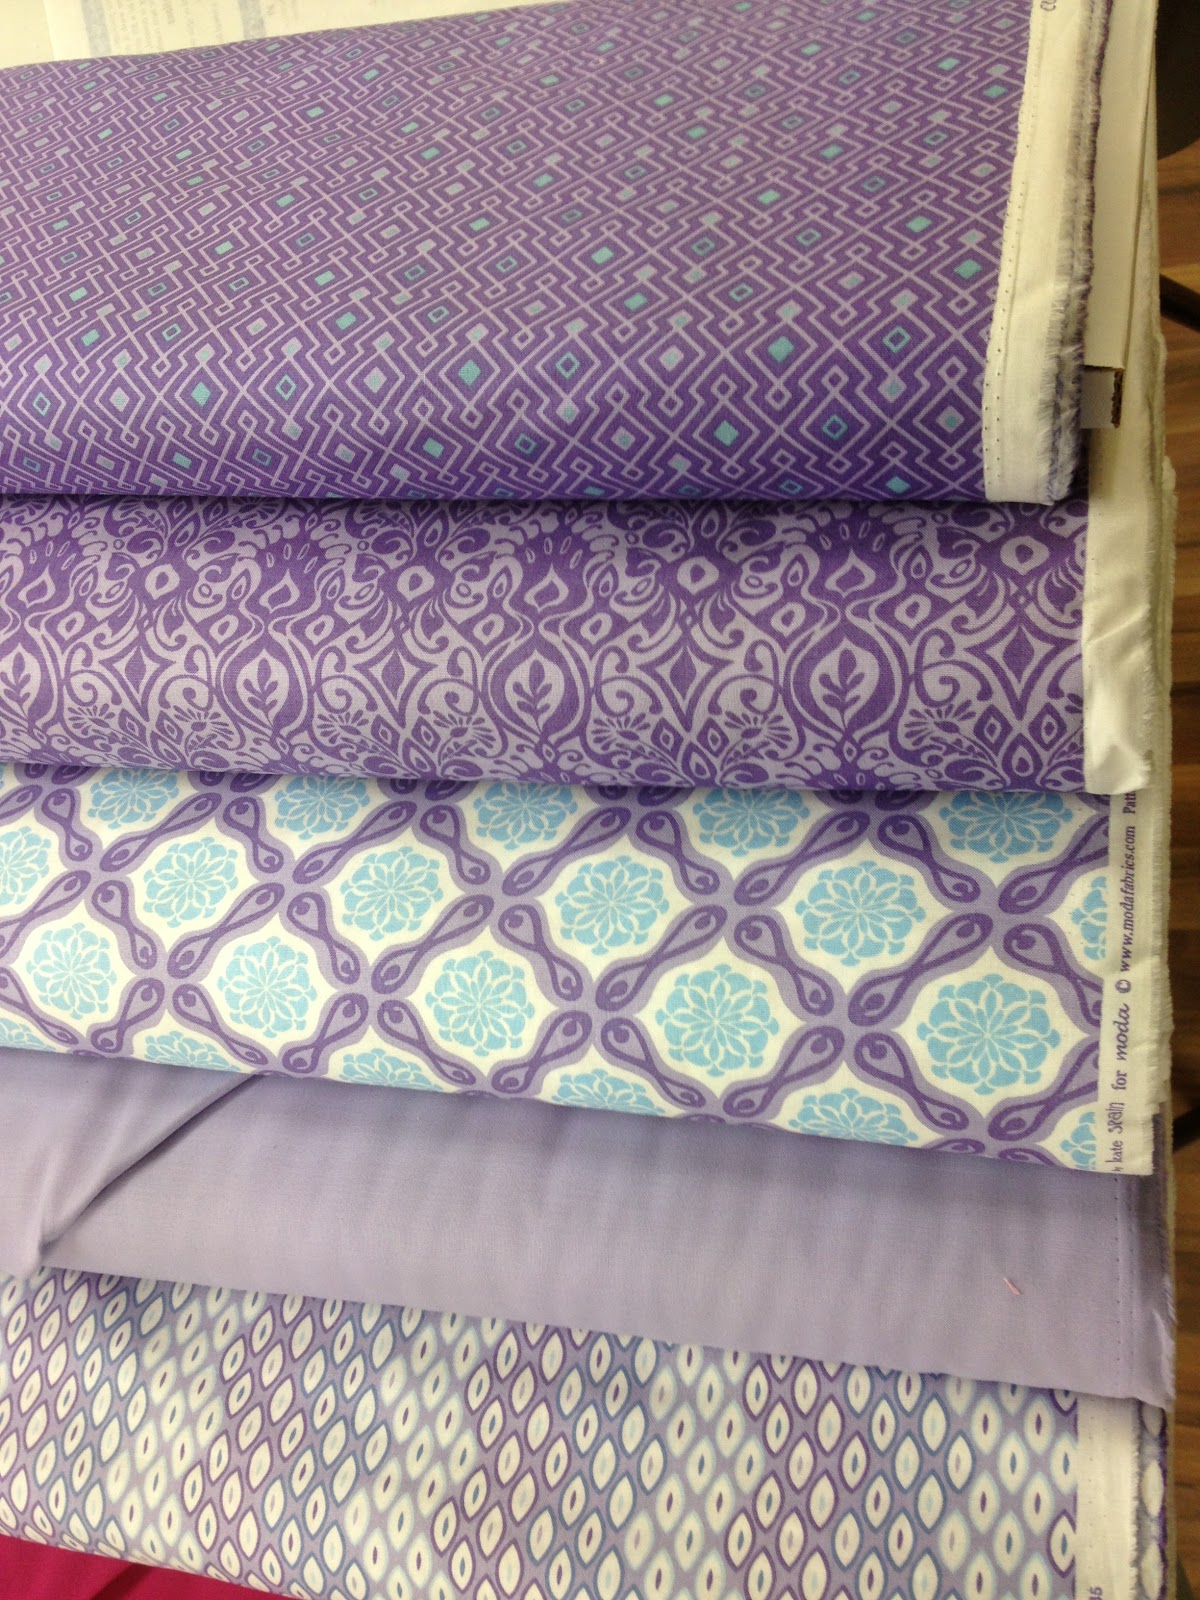
Just a quick note to show you what arrived on my doorstep this morning!!!  Cuzco by Kate Spain..... oh be still my heart.


So many possibilities so little time!

I am also in the final stages of creating my "Snow Woman". Since taking this photo I have done French knots for her eyes and mouth and I'm on the last of the blanket stitching.  I'll take some photos as I create the cushion.  By the way I use Anni Downes Christmas Time fabric collection to create this lovely project and it's all available here in the shop!

Tuesday, November 27, 2012

Class Schedule

I have posted a new class schedule and am looking at adding some additional workshops over the next few days. One class that I will be adding is a Back to Basics workshop. This workshop is a technical class and is all about proper cutting techniques, precision cutting and piecing allows you to create this:


Monday, November 26, 2012

Class Roundup

First, a very big Thank You to all my customers and all of you out there in cyberspace for a fantastic year!  The text messages and phone calls I receive from you make all the hard work worthwhile.  I have some great ideas for this coming winter, spring and yes even next summer, so stay tuned.  Right now I am trying to finish up all the weekly classes and then spend some well deserved time off with my family.

Before I show off a few pictures of what we've been up to in some of the classes, I need to conduct a little business.  We are offering a class with Valerie Mullaly on 26 January, and already we have 10 participants.  If you are interested in taking this class please contact me asap since we will cut off the number at 12.  The course is all handwork and is €40 for the day and this price includes the kit.
Here are pictures of the two pieces that you can choose from on the day.


 Sew here we go onto the classes, just a small glimpse at what the women have been up to.  The beginners are finishing up their blocks so it will be another week or so before I have any pictures of their finished projects.

Here is the Monday morning group with a few of their Lone Star quilts or wall hangings:


Fabulous work, will get some photos next week at our last meeting.

The Wednesday morning group is finishing up their projects which were based on a project from the Kim Diehl book Simple Comforts.  These are going to be truly treasured and well they should be.

Ruth's almost complete top!  Gorgeous...

Betty won't let us photograph hers until she's done!!!


Brid's quilt in the adding vines stage
This project is something that I am thinking might be a great 4 part workshop for Intermediate quilters, an opportunity to do a project that you've always admired from afar but not quite sure if you would be up to the challenge on your own.  I'll be your very own motivation coach, sounds good don't ya think!!??

We are rearranging our class schedules for next term and already I have an almost full beginners class for January.  If you know of anyone interested in joining us please get in touch soon. There is always a warm welcome newcomers and our groups are very good at having loads of laughs.

Friday, November 23, 2012

A Small Slice of Heaven

Well, we're back from the Knit & Stitch show and it is hard to believe that we are flying through November. I have been busy as always with the shop, classes and family.  What have I been up to, lets take a look!

In October I finished up block one of the Sweet Heart Houses BoM, I am falling behind with block 2 so i will be busy over the next two weeks getting that ready.


The small quilt that I was working on "Kylee's Quilt" with the Eleanor Burn's ruler is finally done and was used in a finishing workshop, prairie points were added to the top and then quilted.  It was hanging in our booth at the Knit & Stitch Show. Here is the completed quilt in case you haven't seen it.

A week before the Knit & Stitch Show we received a new line of fabric from Moda, Cinnamon Spice by Black Bird Designs.  What a gorgeous line of fabric, I just want to hide it in my own personal stash!!!
Here is the quilt that I quickly made up for the show, so beautiful and a very quick project to do.

Hmmmm, what else is new?!   Our workshop at the end of January with Valerie Mullaly is really filling up, only a few seats left.  We have bought in a small selection of felted wool, my hope is that we can carry some lovely wools for our customers who enjoy working in this medium.  Valerie gave it quick inspection and gave the samples the thumbs up so if you are interested let us know.  Customer feedback is very important to me, I enjoy carrying stock of hard to find items.
I do hope to have some lovely photos to share with you over the next couple of days.
Enjoy and Happy Sewing!
Anne Marie

Sunday, September 30, 2012

A Productive Weekend

What did you do this weekend?  I had a very productive three days, Saturday was spent in my official lounging gear creating this beauty for next Saturday's 2 Hour Tulip Bag

This is a standard size bag, we will be making the next size up which supposedly you can fit a volleyball into. I had great fun making it and guess what, it only took 2 hours!  We have 3 spaces left so give us a call or text me. The class is on Saturday from 12:00 to 3:00 or thereabouts.  You will need 1 yard of fabric for handles and outside of bag and 1 yard of fabric for the interior.  You will also need 2/3 of yard of pellon fusible fleece and 1/2 yard of pellon decor bond for interfacing.  The shop has fusible fleece and decor bond so don't panic if you don't have any.

We are running two workshops in November, you can either come for a half day or a full day and we will be creating some fun and quick gifts for family and friends.  Here is one of the items that I created for the craft day and it is made using 1/2 yard of christmas fabric and some Soft and Stable wadding.  This is really fun to make and super fast, what a great way to package some of your home baking as a gift for a neighbor or teacher!
Before the string is added to the top 

Cute!
The bucket handle can be rotated backward and forward for easy filling and easy emptying!

Today we had great fun with our introductory Applique class, as always there were alot of laughs and some serious comsumption of chocolate chip cookies.  We are very lucky to have such a great group of customers and that they bring their joy of quilting to every session!
We are getting ready for the Knit n Stitch show at the RDS the first of November thru the fourth.  We will be located in Booth N11 which is ironic since that is the location of our home and shop!!
Happy Sewing!
Anne Marie

Sunday, September 9, 2012

Colourful Kites part II

I thought I would continue tonight with my fun project, I was working on it briefly late this afternoon and rather than wait and forget about a follow up post, I decided to make a post tonight.  Remember I told you that after you add the third piece you would press them open and then trim.  Well, here is a photo of the block with the ruler on it before I trim.

I would line up the centre V with the pieced block and you can see the dashed line is your 1/4" seam allowance.  By using this specialty ruler you get a perfect square, no points cut off!  But no specialty ruler is going to work unless your original cutting and sewing is straight and precise.

Okay, you have trimed all your pieced blocks, what can be do with them.  I have a few photos of blocks that I have placed on the cutting mat.
This is how it would look if the blocks are sewn side by side.

You would have some great secondary patterns by sewing them this way.
Here is a possible sashing and post setting and as you can see I turned my four squares in the opposite direction as the photo above. I prefer the above photo but I thought you might like to see it positioned differently. Also, if you wanted to really get complicated you could have alternate colours for your outer triangles. So instead of all white diamonds, your diamonds would be two colours.  I think the design possibilites could be fun to explore.

I will leave you with this and will hopefully have more to show you later in the week.

Take a look at our workshop listings, a nice selection of classes are on offer as well as some quilt weekends.  Treat yourself to some fun and bring a friend along!

Happy Sewing.
Anne Marie

Saturday, September 8, 2012

Colorful Kites

I wanted to do something today, a project for the pure pleasure of sewing and playing with bright colours!  I have been playing with this ruler off and on but hadn't quite ever settled on a colour scheme that I really had the urge to play with.  Sew, here we go!  I am a huge Eleanor Burns fan as many of you may know.  I think her books are marvelous, especially for beginners.  She leaves nothing to chance, she goes into great detail about everything from choice of colours and why, as well as all the tools that you will need.  The Quilt in The Day Books show you every step no matter how big or small the steps may be, the books are well thought out and produced.
Here is the ruler I was playing with today, a 4 1/2" On-Point Ruler. You can use either a charm pack of precuts which is 42 5" squares or you can use 10 Layer Cake squares which are 10" square precuts.  I made my own 10" squares as well as a few 5" squares.

Specialty rulers are great fun to have, some are more practical than others but like all tools if you take good care of them they will last forever.  There are people that will tell you that you don't need them, you can use cardboard or paper templates.  After 28 years of doing patchwork, I can honestly tell you that cardboard and paper don't stand up well with a rotary cutter and your finished blocks will be be inconsistent.

I love using a new ruler, it gives me an opportunity to try different shapes and it challenges me to think about all the different uses and the design possibilities.

I decided to follow the pattern on the ruler, a way of testing it to see if I can get the same results that the ruler claims you can get.

Here is a photo of the pieces for the block.  The center piece is the fabric from the Layer Cake or Charm Square.  I chose to use a white on white background fabric since the undertones of the fabrics that I am using are white.
Do you see how I trimmed the 1/4" corner off the white?  This will allow me to line up my triangles with ease without having to figure out if the overhang of the the white triangle is an exact 1/4". Are you confused now... trust me it took me years to figure out that if I trimmed my triangles when working with say a 60 degree triangle, I would get perfect results.
In the above photo the white triangle is right side facing down and the trimmed corner is even with the edge of the brown fabric.  If I had not trimmed off the corner I would have been trying to guess whether the pointed was a 1/4" above the brown and if I didn't get it right! God help us, the seam ripper would be out and I would be losing time with every set of triangles!!!!

When I open up the two pieces I have even sides.  WooHoo!!!!  It's the simple things in life that make me happy.
The blocks go together very fast, I recommend chain piecing.  Life takes on a new dimension when you start chain piecing, don't be afraid to give it a try.  One of the benefits of chain piecing is that you keep your work very organized and therefore you piece quicker but the biggest benefit is you don't waste as much thread!
After pressing my first two pieces open, I add the third piece, then press that open and here we are!  Actually this picture was taken after I used the ruler to trim all four sides down to the correct size.
This is what I am going to leave you with right now.  This is how I left the cutting table this evening.  Will do some more playing tomorrow!  Stay tuned for more.

Tomorrow is a big day, we have a girls u-12 football county final.  Way to go Clonee, you girls are outstanding!!!!!!  And then we are going to watch the All Ireland Hurling Championship, as the granddaughter of a proud Galway woman.... UP GALWAY!!!!!!!!!!

Happy Sewing!
Anne Marie

Wednesday, August 29, 2012

Sale, Sale, Sale!!!

This week has been crazy here at the shop. Between working on some new projects with the Christmas fabrics that have been arriving, organizing fabrics for our upcoming sale and teaching, I am exhausted.
The sale starts on Sunday, 2 September at 10:00 am. and will continue all week until the following Sunday.
Hope to see you there!

On Monday I made a few coasters or Mug Rugs with extra squares from a really adorable Christmas panel from the Anni Downes Christmas Time Collection from Henry Glass Fabrics. Not exactly rocket science but quick and enjoyable to make up, they would be a great gift at Christmas.
 
I am hoping to make a nice lap quilt for our sitting room with this panel.

The coordinating fabrics and yarn dyes are beautiful.


I have also been organizing all the fabrics that are going to be marked down for a super sale!  We have some beautiful fabrics that are going to be marked down for clearance starting on Sunday.  There are a few layer cakes and jelly rolls on offer as well, Christmas fabrics and other assorted treasures!  A comment I get from customers who read the blog and make a trip down to visit are always surprised at the how big our space is and the photos on our blog don't do it justice.

We have an ever growing selection of Kansas Troubles from Moda.  Probably our most popular group of fabrics.

We also managed to squeeze in a workshop this week, a Free Motion Quilting Workshop!  A great group of ladies from Wexford, Meath, and Louth. That photo is courtesy of my 12 year old daughter and is not the most complimentary photo of moi..... Our Free Motion class is proving to be a popular class and I'm pleased with the response to it.  I will be putting it on the schedule for this autumn so watch for it, hopefully it will be a great start to understanding the mysteries of Free Motion Quilting.

Thursday, August 16, 2012

Ohio Stars....Point Perfection

I am desperate for something to blog about. Sew, after the painting workshop last week and questions about getting those all important perfect points, I decided to take some photos and give you some measurements and go over how you construct really lovely Ohio Stars!


This tablerunner was made up of 3 Ohio Stars and 2 - 9 1/2" Squares of the light tan background fabric.  To construct an Ohio Star is fairly straight forward. It is a nine patch with 4 - 3 1/2" squares lt tan background fabric for the 4 corners, a 3 1/2" center square, and last but not last 4 squares that are called a 4 part triangle.  The 4 part triangle is where you need to pay particular attention.

In the above picture my 4-part triangles are made up of 3 colours; green, gold, and lt tan.  Take 1 gold square measuring 4 1/2", 2 green squares measuring 4 1/2" each, and one lt tan background fabric measuring 4 1/2".


Place the lt tan square right side facing the right side of one of the green squares, make sense?  Do the same with the second green square and the gold square. Right sides facing on another.  Now take the two sets of squares and draw your three lines across the diagonal from point to point. Just like the picture to the left.  The middle line is going to be your cutting line so you need to stitch along the two outside lines. Now, here is my trick so pay real close attention; when I stitch along the two out side lines I don't stitch on the line!!!!  I stitch along the line on the seam side, meaning the area closest to the the cutting line.

Cut along the middle line and press toward the dark colour both sets.  You now have 4 half square triangles, 2 are lt tan and green and 2 are gold and green.


Now, take a lt tan and green HST (Half Square Triangles) and a gold and green HST and lay them right sides facing with the two greens facing the opposite colour, huh????


Okay, just pretend that the burgundy is green!! Your next step is to draw your three lines on the diagonal from corner to corner just like you did in the first round of making HST's, only make sure you are going across the square and not along the new seams.  Do your sewing and then cut down the center.

Now here is my second trick, I swear by the Eleanor Burns Square Up ruler. Before I open up the triangle,  I place my square up ruler on the triangle and lay the 3 1/2" line of the ruler on the stitching line. I actually place the line of the ruler slightly above the stitch line.  This gives me a bit of room, a couple of threads of room to be exact! I trim with the rotary cutter on both side of the triangle, this evenly trims the HST so that the dark triangle will be the same size as the light triangle.


See the above picture, isn't that lovely!  After trimming the square you can open it up and give it a light press and measure it up to ensure that the 4 part triangle square is 3 1/2".

Cutting, sewing a straight line and proper pressing are crucial for getting nice sharp points and perfect piecing.  This is a lovely square to make and when it is constructed well you have a gorgeous block, give it a try!

Happy Sewing and don't forget we are having a big sale starting on the 2 September!
Anne Marie


Saturday, August 4, 2012

We Have a Winner!

After a super busy two weeks I finally sat down and using a random number generator we have a winner! The winner of the Fat eighth pack is number 7 or rather Elaine Coady. Congrats Elaine and thanks everyone for taking part. Sew, Elaine could you please email me privately with your snail mail address so I can send out your bundle of fat eighths and as a bonus you will be receiving a few yarn dyes from the Anni Downes Christmas Time Collection.

I am relieved to be much quieter this week with the B&B, we had guests from Austria last week (Hi Anne Marie, Franz & Martin).  Anne Marie is a quilter and we had a great time getting to know one another, needless to say we spent time in the shop doing what we all enjoy most and that is picking fabric for a new project. Anne Marie promises to bring some of her Austrian quilting friends with her for a visit, when they do I will have to gather up some of my quilting friends for a little show and tell!

  On Tuesday, 7 August, we are running a fun workshop with a Christmas theme.  I taught this class a couple of times last autumn and it was a big hit!  People who missed out last year are asking me to run it again so here we go.  This is a table runner, quite a big one, with a slight twist to it.  As you can see we have two Ohio Star blocks (the actual runner has three) and in the alternate block is a painted stencil of a Christmas tree just waiting for some embellishments.  The white paper is freezer paper with the shapes of holly leaves cut out and the stencil brushes and paints are waiting for the action to begin.  Painting on fabric!!!!  A great alternative to applique and you look like Michelangelo to family and friends when you tell them that you painted on the Christmas motifs.
And lookey what else you can do!! Yes, the word "Joy" is painted on as well.
This Christmas wall hanging has a painted branch on it, the pathetic pine needles were my attempt at embroidery, I love this piece, it is so unique.

Sew, what do you need?  About a yard of cream/lt tan background fabric, several fat quarters for your three Ohio stars preferably in Christmas colours, and your sewing machine and notions.  I supply the paint brushes and paints as well as the freezer paper.  The price for the day is €40, and as always tea and coffee are on the house. We have a few places still available and I can guarantee this is a very relaxing and fun day and completely different.

Don't forget to mark your calendars, the first week of September is our big sale! Plenty of gorgeous fabrics will be marked down.

Happy Sewing!
Anne Marie